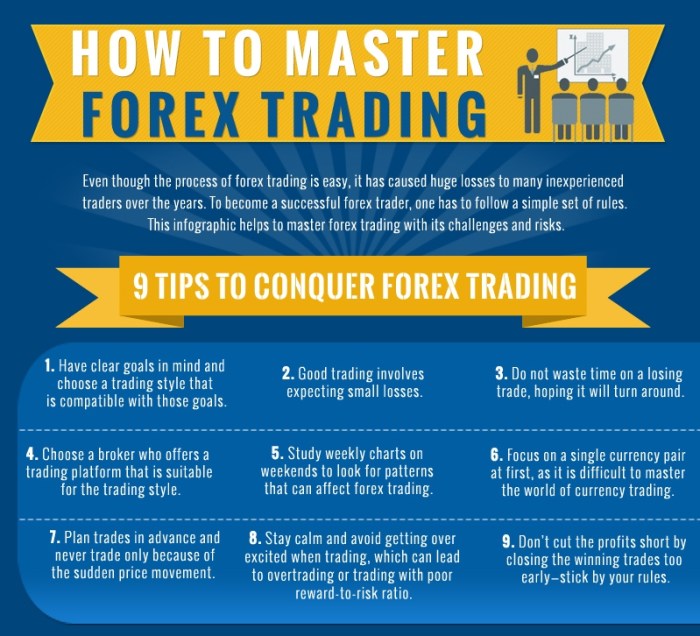
How to Master Forex Price Action Trading: Dive into the thrilling world of forex trading, where understanding price action is your secret weapon. Forget complicated indicators; we’re unlocking the power of raw price movements, candlestick patterns, and chart formations to predict market trends and profit from them. Get ready to decipher the market’s whispers and turn them into winning trades.
This guide will equip you with the skills to identify key support and resistance levels, master candlestick patterns like a pro, and utilize chart patterns to your advantage. We’ll also cover crucial risk and money management strategies to protect your capital and maximize your returns. Prepare to transform your forex trading game from novice to master.
Understanding Forex Price Action
Forex price action trading is all about reading the market’s language – the way price moves on a chart – to predict future movements. It’s a powerful technique that focuses on interpreting candlestick patterns and chart formations, minimizing reliance on lagging indicators. By mastering price action, you can gain a significant edge in the forex market, improving your trading decisions and potentially boosting your profitability.
Fundamental Principles of Price Action Trading, How to Master Forex Price Action Trading
Price action trading hinges on the belief that all relevant information is already reflected in the price. This means that technical indicators are essentially redundant, as they simply lag behind the actual price movements. Instead, price action traders focus on identifying patterns in the price itself – the highs, lows, and the way the price moves between them – to predict future trends. They look for confirmation of price movements through candlestick patterns and chart formations, creating a more holistic understanding of market sentiment. Successful price action trading requires discipline, patience, and a keen eye for detail. It’s about identifying clear signals, managing risk effectively, and understanding market context.
Types of Price Action Patterns
Price action patterns are visual representations of market sentiment and potential future price movements. They are formed by the interplay of buyers and sellers, reflected in the candlestick formations and their arrangement on the chart. Understanding these patterns is crucial for making informed trading decisions.
Candlestick patterns are individual candles that reveal information about the buying and selling pressure during a specific period. For example, a bullish engulfing pattern (where a large green candle completely engulfs a previous red candle) signals a potential bullish reversal, while a bearish engulfing pattern (the opposite) suggests a potential bearish reversal. Other significant candlestick patterns include hammers, hanging men, shooting stars, and doji. These patterns provide insights into the short-term dynamics of the market.
Chart patterns, on the other hand, encompass larger formations created by multiple candlesticks. These patterns can offer a longer-term perspective on market trends. Examples include head and shoulders (a bearish reversal pattern), double tops and bottoms (reversal patterns), triangles (continuation patterns), and flags and pennants (continuation patterns). These patterns often involve trendlines and support/resistance levels, providing a more comprehensive analysis of price movement.
Identifying Price Action Patterns on Various Timeframes
Identifying price action patterns requires analyzing charts across different timeframes. A pattern that’s significant on a daily chart might be less significant on a 5-minute chart, and vice versa. For example, a head and shoulders pattern might form over several weeks on a daily chart, indicating a potential major trend reversal. However, the same pattern might not be as clearly defined on a 1-hour chart. Similarly, a bullish engulfing pattern might appear on a 5-minute chart, signaling a short-term buying opportunity, but it might not necessarily translate into a larger trend. Therefore, it’s essential to analyze charts across multiple timeframes to gain a more complete picture and avoid false signals. This multi-timeframe analysis helps confirm the validity of identified patterns and increases the accuracy of trading decisions.
Reliability and Profit Potential of Price Action Patterns
The reliability and profit potential of different price action patterns vary significantly. While some patterns have a higher success rate, none guarantee profits. Risk management is paramount.
| Pattern Name | Description | Reliability | Profit Potential |
|---|---|---|---|
| Bullish Engulfing | A large green candle completely engulfs a previous red candle. | Medium | Medium |
| Bearish Engulfing | A large red candle completely engulfs a previous green candle. | Medium | Medium |
| Head and Shoulders | A three-peak formation with the middle peak being the highest. | High | High |
| Double Top/Bottom | Two similar price peaks/troughs followed by a reversal. | Medium-High | Medium-High |
Identifying Key Support and Resistance Levels
Mastering forex price action trading hinges on accurately identifying key support and resistance levels. These levels act as magnets, influencing price movements and providing crucial entry and exit points for traders. Understanding how to spot these levels is paramount to consistent profitability.
Support and resistance levels represent price zones where buying or selling pressure is particularly strong. They’re essentially psychological barriers formed by past price highs and lows, significant news events, or even purely psychological price points (like round numbers). Identifying these levels allows traders to anticipate potential price reversals or breakouts.
Support and Resistance Level Identification Methods
Several methods can help identify support and resistance levels. These include analyzing historical price charts, using technical indicators, and recognizing psychological levels. Combining these methods provides a more comprehensive understanding of potential support and resistance zones.
Analyzing historical price charts involves looking for previous price lows (support) and highs (resistance) that have held. These past price levels often act as barriers to future price movements. Look for instances where the price bounced off a specific level multiple times. The more times a level holds, the stronger it is considered to be. For example, if the price consistently bounces off $1.2000 USD/EUR, that becomes a strong support level.
Browse the implementation of How to Stay Profitable with Forex Trading in 2025 in real-world situations to understand its applications.
Technical indicators, such as the Fibonacci retracement tool, can also help identify potential support and resistance levels. The Fibonacci retracement tool uses specific percentages (23.6%, 38.2%, 50%, 61.8%, and 78.6%) to identify potential reversal points within a trend. These percentages are derived from the Fibonacci sequence, a mathematical sequence found throughout nature, and often coincide with key support and resistance levels. For instance, a retracement to the 38.2% Fibonacci level after a significant uptrend could indicate a potential support level.
You also can understand valuable knowledge by exploring How to Avoid Overtrading in Forex.
The Importance of Psychological Levels
Psychological levels are price points that hold significant psychological importance for traders. These are often round numbers (e.g., 1.5000, 100.00, 10,000) or significant integer values. Traders tend to place orders around these levels, creating increased buying or selling pressure, making them act as natural support or resistance points. For example, a currency pair might find strong resistance at the psychologically significant level of 1.0000, simply because of its round number appeal.
Using Support and Resistance for Trade Entry and Exit
Support and resistance levels provide traders with potential entry and exit points. A common strategy involves buying near support levels, anticipating a price bounce, and selling near resistance levels, anticipating a price reversal. However, it’s crucial to remember that breakouts can occur, invalidating the support or resistance level. Therefore, it’s essential to use stop-loss orders to manage risk.
For example, if the price approaches a strong support level at $1.1800 and shows signs of bullish reversal (e.g., a bullish candlestick pattern), a trader might enter a long position (buy) with a stop-loss order placed slightly below the support level, perhaps at $1.1780. If the price breaks through the resistance level at $1.2000, and shows signs of bearish continuation, a trader might consider closing the long position and/or entering a short position (sell).
Visual Representation of Support and Resistance in Price Prediction
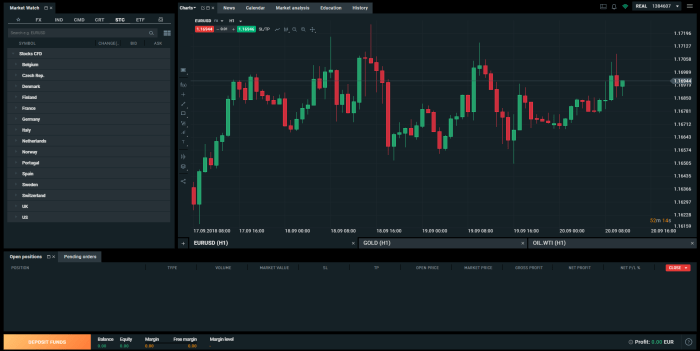
Imagine a chart showing the USD/JPY exchange rate. The chart displays several previous highs and lows. Let’s say a significant high was established at 110.00, followed by a lower high at 108.00, and then another lower high at 107.00. These highs form a clear resistance trendline. Similarly, lows at 105.00, 106.00, and then a higher low at 107.00, show an upward trendline which acts as support. A trader could anticipate that if the price rises towards 107.00 (resistance) and encounters selling pressure, it could reverse. Conversely, if the price falls towards 107.00 (support) and encounters buying pressure, it could bounce back up. The area between 107.00 and 108.00 represents a significant zone of contention, where price is expected to fluctuate before potentially breaking out of the range. The visual representation would show horizontal lines drawn at the 107.00 and 108.00 levels, clearly indicating the support and resistance zones. The trendlines connecting the highs and lows further enhance the visualization of the overall price action and predicted direction. The actual price movement would then be plotted against these lines, demonstrating how the price interacts with these key levels.
Mastering Candlestick Patterns: How To Master Forex Price Action Trading
Candlestick patterns are visual representations of price action over a specific period, offering valuable insights into market sentiment and potential future price movements. Understanding these patterns can significantly enhance your forex price action trading strategy, helping you identify high-probability trading setups and manage risk more effectively. By mastering candlestick patterns, you’ll move beyond simply reacting to price changes and begin proactively anticipating market shifts.
Candlestick Pattern Interpretations
Various candlestick patterns convey distinct signals. For example, a hammer suggests a potential bullish reversal, characterized by a small body with a long lower wick, indicating buyers stepped in to prevent further price decline. Conversely, a hanging man, similar in appearance but found at the top of an uptrend, hints at a potential bearish reversal. Engulfing patterns, where one candle completely engulfs the previous candle, signal a potential trend reversal—bullish engulfing if the second candle is bullish and bearish engulfing if the second candle is bearish. Doji candles, featuring equal opening and closing prices, represent indecision in the market and often precede significant price movements. These are just a few examples; many other candlestick patterns exist, each with its unique interpretation.
Bullish and Bearish Implications of Candlestick Patterns
The interpretation of a candlestick pattern depends heavily on its context within the broader market trend. A bullish pattern like a hammer might be weak and unreliable if it appears within a strong downtrend, while a bearish pattern like a shooting star might be less significant if it forms within a strong uptrend. Confirmation from other price action indicators or supporting technical analysis tools is crucial to increase the reliability of the signal. For instance, a bullish engulfing pattern confirmed by a break above a key resistance level significantly strengthens the bullish signal. Conversely, a bearish engulfing pattern coupled with a breakdown below key support significantly strengthens the bearish signal. Therefore, context is king when interpreting candlestick patterns.
Using Candlestick Patterns with Other Price Action Indicators
Candlestick patterns are most effective when used in conjunction with other price action indicators and technical analysis tools. Combining them with support and resistance levels, trendlines, moving averages, and volume analysis provides a more holistic and reliable trading strategy. For example, observing a bullish engulfing pattern at a key support level, confirmed by increasing volume, strengthens the probability of a price reversal and offers a higher-confidence trading opportunity. Similarly, identifying a bearish engulfing pattern near a resistance level, accompanied by decreasing volume, could signal a potential trend change. This combined approach reduces the risk of false signals and improves the accuracy of your trading decisions.
Top 5 Most Reliable Candlestick Patterns
Several candlestick patterns exhibit higher reliability than others due to their consistent performance in various market conditions. While no pattern guarantees success, these consistently provide valuable insights:
- Bullish Engulfing Pattern: A strong indication of a potential bullish reversal, where a larger bullish candle completely engulfs the previous bearish candle.
- Bearish Engulfing Pattern: A strong indication of a potential bearish reversal, where a larger bearish candle completely engulfs the previous bullish candle.
- Hammer: A bullish reversal pattern characterized by a small body and a long lower wick, suggesting buyers stepped in to prevent further price decline.
- Hanging Man: A bearish reversal pattern resembling a hammer but appearing at the top of an uptrend, suggesting a potential price reversal.
- Doji: A neutral pattern with equal opening and closing prices, indicating indecision and often preceding significant price movements. Its significance is amplified when combined with other price action or volume analysis.
It is important to note that the reliability of any candlestick pattern increases significantly when confirmed by other technical indicators and price action analysis. Isolated use can lead to false signals and should be avoided.
Utilizing Chart Patterns in Price Action Trading
Chart patterns are visual representations of how price moves over time, offering valuable clues about potential future price direction. Recognizing and interpreting these patterns can significantly enhance your price action trading strategy, helping you identify high-probability trading setups. However, it’s crucial to remember that no pattern guarantees success, and confirmation is always key.
Common Chart Patterns and Their Interpretations
Several recurring chart patterns reveal shifts in market sentiment and potential price reversals or continuations. Understanding their characteristics is vital for effective trading. The Head and Shoulders pattern, for instance, often signals a bearish reversal, while triangles suggest a period of consolidation before a breakout. Flags and pennants, on the other hand, typically indicate a continuation of the prevailing trend. Accurate interpretation depends on context, including the overall market trend and volume. Misinterpreting these patterns can lead to losses.
Risks and Rewards Associated with Chart Patterns
Trading chart patterns involves inherent risks and rewards. The potential reward is often proportional to the risk. For example, a successful trade based on a Head and Shoulders pattern could yield substantial profits if the price breaks below the neckline, as predicted. Conversely, a false breakout can lead to significant losses. Similarly, a triangle pattern’s breakout might not materialize as expected, resulting in a failed trade. Effective risk management is crucial to mitigate potential losses. This includes setting stop-loss orders and defining clear profit targets.
Strategies for Confirming Chart Patterns Before Entering a Trade
Confirmation is paramount before entering a trade based on a chart pattern. Relying solely on the visual appearance of a pattern is insufficient. Several strategies enhance confirmation. For example, observing increased trading volume during a breakout strengthens the signal. Similarly, aligning the pattern with broader market trends and technical indicators (like RSI or MACD) adds another layer of confirmation. Furthermore, waiting for a clear price break beyond the pattern’s boundaries reduces the risk of entering a false signal. Confirmation increases the probability of a successful trade, minimizing potential losses from false breakouts.
Trading a Triangle Pattern: A Step-by-Step Flowchart
The following flowchart illustrates the process of identifying and trading a symmetrical triangle pattern. This pattern, characterized by converging trendlines, typically precedes a decisive price move.
Imagine a chart showing a symmetrical triangle. The upper and lower trendlines converge, creating a triangular shape. The price action within the triangle shows periods of consolidation.
| Step | Action |
|---|---|
| 1 | Identify a symmetrical triangle pattern on the chart. |
| 2 | Observe the price action within the triangle; look for signs of consolidation. |
| 3 | Assess volume; increased volume during a breakout is a positive sign. |
| 4 | Wait for a decisive breakout above the upper trendline (for a long position) or below the lower trendline (for a short position). |
| 5 | Place a stop-loss order just below the lower trendline (for long positions) or above the upper trendline (for short positions). |
| 6 | Set a profit target based on the pattern’s height or other technical analysis. |
| 7 | Monitor the trade and manage risk accordingly. |
Risk Management and Money Management in Price Action Trading
Consistently profitable forex trading isn’t just about identifying winning trades; it’s about surviving the inevitable losses. This is where robust risk and money management strategies become paramount. Without them, even the most accurate price action predictions can lead to devastating account drawdowns. This section details the essential techniques to protect your capital and maximize your long-term success.
Stop-Loss Orders and Position Sizing
Stop-loss orders are your safety net. They automatically close a trade when the price moves against you by a predetermined amount, limiting potential losses. Position sizing, on the other hand, determines how much capital you allocate to each trade. Effective position sizing prevents a single losing trade from wiping out your account. The key is to find a balance that allows you to capture profits while limiting risk. For instance, a common strategy is to risk no more than 1-2% of your trading capital on any single trade. If your account balance is $10,000, a 1% risk tolerance means your maximum loss per trade should be $100.
Calculating Appropriate Position Sizes
Calculating your position size involves several factors: your account balance, your risk tolerance (as a percentage), the stop-loss distance (in pips), and the currency pair’s pip value. Let’s say you’re trading EUR/USD with a $10,000 account, a 1% risk tolerance, and a stop-loss of 20 pips. If one pip is worth $10 (depending on your leverage and broker), your maximum loss would be 20 pips * $10/pip = $200. To stay within your 1% risk tolerance ($100), you’d need to adjust your position size accordingly. This calculation often involves using a position size calculator, readily available online, which simplifies the process and ensures accuracy.
A Sample Risk Management Plan
A well-defined risk management plan is crucial. This plan should detail your stop-loss strategy, take-profit targets, and position sizing methodology. For example:
* Stop-Loss: Place a stop-loss order at a level that minimizes potential losses while still allowing for normal market fluctuations. This level could be based on support levels, technical indicators, or a fixed percentage from your entry price.
* Take-Profit: Set a take-profit target based on your price action analysis and risk-reward ratio. A common approach is to aim for a risk-reward ratio of at least 1:2 or 1:3, meaning your potential profit is at least twice or three times your potential loss.
* Position Sizing: Always calculate your position size based on your risk tolerance and stop-loss placement. Never exceed your predetermined risk percentage per trade. Regularly review and adjust your position sizing as your account balance grows.
* Diversification: Don’t put all your eggs in one basket. Diversify your trades across different currency pairs to mitigate risk.
Money Management Strategies
Several money management strategies can help you navigate the forex market. The fixed fractional approach, for example, involves risking a fixed percentage of your capital on each trade, regardless of the potential profit. Other strategies, such as the Kelly Criterion, aim to maximize long-term growth, but they require careful calculation and understanding. The optimal strategy will depend on your risk tolerance, trading style, and overall financial goals. It is crucial to choose a strategy that aligns with your risk profile and consistently apply it.
Developing a Trading Plan

A robust trading plan is your roadmap to consistent profitability in forex price action trading. It’s not just about knowing the technical indicators; it’s about having a structured approach that minimizes emotional decisions and maximizes your chances of success. A well-defined plan acts as a filter, helping you identify suitable trading opportunities and avoid impulsive trades fueled by fear or greed.
Essential Components of a Comprehensive Trading Plan
A comprehensive trading plan should encompass several key areas. These elements work together to create a system that’s adaptable, resilient, and ultimately profitable. Ignoring any of these aspects can significantly weaken your overall trading strategy.
- Trading Strategy: This defines your specific approach, including the timeframe you’ll trade (e.g., daily, hourly), the price action patterns you’ll focus on (e.g., pin bars, engulfing patterns), and your entry and exit rules. For instance, your strategy might involve entering long positions only after a confirmed bullish engulfing pattern appears on the 4-hour chart and exiting when a pre-defined stop-loss or take-profit level is reached.
- Risk Management: This is crucial for preserving your capital. It involves determining your position sizing (how much capital to risk on each trade), your stop-loss placement (where to exit a losing trade to limit losses), and your take-profit levels (where to exit a winning trade to secure profits). A common rule is to risk no more than 1-2% of your account balance on any single trade.
- Money Management: This dictates how you allocate your capital across different trades and manage your overall portfolio. It might involve diversification (spreading your trades across multiple currency pairs) or a specific approach to scaling your positions based on your account growth. For example, you might increase your position size gradually as your account balance increases, but only after consistently demonstrating profitable trades.
- Market Analysis: This section Artikels your approach to analyzing the forex market before entering a trade. It might include fundamental analysis (considering economic news and events) or focusing solely on technical analysis (chart patterns and indicators). A common approach would be to use price action as the primary analysis method, supported by a secondary indicator like moving averages to confirm trends.
- Trading Journal: This is a record of your trades, including entry and exit points, reasons for entering the trade, and the results. Regularly reviewing your journal helps identify patterns in your successes and failures, allowing you to refine your strategy over time. This journal should be detailed, noting not just the P/L but also the reasoning behind each trade.
Backtesting and Forward Testing a Trading Plan
Before risking real money, it’s vital to thoroughly test your trading plan. Backtesting involves analyzing historical market data to see how your strategy would have performed in the past. This helps identify weaknesses and refine your approach. Forward testing, on the other hand, involves applying your strategy to live market data with a small amount of capital (e.g., a demo account) to evaluate its performance in real-time conditions. Both are crucial for validating your plan’s effectiveness and identifying potential flaws. Backtesting should use sufficient historical data (at least several years) to account for various market conditions. Forward testing should be conducted for an extended period (several months) to ensure robustness.
Adapting a Trading Plan Based on Market Conditions
The forex market is dynamic and constantly changing. A rigid trading plan is unlikely to be consistently successful. Your plan should be adaptable, allowing you to adjust your strategy based on prevailing market conditions. This might involve adjusting your position sizing, stop-loss levels, or even switching to a different trading strategy altogether depending on market volatility. For instance, during periods of high volatility, you might reduce your position size to mitigate risk or temporarily avoid trading until conditions stabilize. Conversely, during periods of low volatility, you might increase your position size to take advantage of potentially larger price swings.
Sample Trading Plan Template
This template provides a basic framework. You need to customize it to fit your specific trading style and risk tolerance.
- Trader Name: [Your Name]
- Trading Style: Price Action Trading
- Timeframe: [e.g., 4-hour, Daily]
- Currency Pairs: [e.g., EUR/USD, GBP/USD]
- Entry Signals: [e.g., Pin bars, Engulfing patterns]
- Exit Signals: [e.g., Take-profit targets, Stop-loss levels]
- Position Sizing: [e.g., 1% of account balance per trade]
- Stop-Loss Placement: [e.g., Below/Above recent swing low/high]
- Take-Profit Targets: [e.g., Risk/Reward ratio of 1:2]
- Risk Management Rules: [e.g., Maximum loss per day, Maximum drawdown]
- Money Management Strategy: [e.g., Fixed fractional position sizing]
- Trading Journal: [Detailed record of each trade]
- Review Frequency: [e.g., Weekly review of performance and adjustments]
Advanced Price Action Techniques

Mastering basic price action is just the first step. To truly excel in Forex trading, you need to delve into more sophisticated techniques that provide a deeper understanding of market dynamics. This involves analyzing order flow, market profile, and volume, ultimately leading to more precise trade entries and exits.
Order flow and market profile analysis offer a powerful combination for understanding market sentiment and identifying high-probability trading opportunities. By combining these advanced techniques with your existing knowledge of candlestick patterns and support/resistance levels, you’ll significantly enhance your trading edge.
Order Flow and Market Profile Analysis
Order flow analysis focuses on the underlying mechanics of how orders are executed in the market. It reveals the collective actions of buyers and sellers, providing insights into the true supply and demand zones. Market profile, on the other hand, visualizes the distribution of trading activity over time and price, highlighting areas of significant volume and price concentration. Combining these two approaches allows traders to identify areas of potential support and resistance, as well as high-probability trade setups. For instance, observing a high volume node on the market profile coinciding with a significant imbalance in order flow can signal a strong potential reversal point. Imagine a chart showing a clear market profile high with significantly more sell orders than buy orders at that price level – this suggests a strong area of potential resistance.
Volume Analysis in Conjunction with Price Action
Volume is often described as the “fuel” that drives price movements. While price action shows what happened, volume reveals the strength behind those movements. High volume confirms price action; low volume suggests weak price movements and potentially unreliable breakouts. For example, a strong upward move accompanied by high volume suggests a strong buying pressure and a more sustainable trend. Conversely, a large price move with low volume indicates a lack of conviction and a higher likelihood of a reversal. Analyzing volume alongside candlestick patterns can further enhance trade setup identification. A bullish engulfing pattern confirmed by a significant increase in volume is a stronger buy signal than one with low volume.
Market Phases: Trending, Ranging, and Consolidation
Forex markets exhibit distinct phases: trending, ranging, and consolidation. Understanding these phases is crucial for adapting your trading strategy. A trending market shows a consistent directional movement, offering opportunities for trend-following strategies. Ranging markets fluctuate within defined support and resistance levels, presenting opportunities for scalping or mean reversion strategies. Consolidation phases are characterized by relatively tight price ranges, often preceding significant breakouts. Successfully navigating these phases requires flexibility and the ability to switch between different trading approaches.
Identifying and Trading Breakouts from Consolidation Patterns
Consolidation patterns, such as triangles, rectangles, and flags, often precede significant price movements. Identifying and trading breakouts from these patterns requires careful analysis of volume and price action. A breakout is confirmed when the price decisively breaks through the consolidation range with increased volume. A false breakout, on the other hand, is a break that fails to sustain momentum, usually retracing back into the range. Successfully trading breakouts involves setting appropriate stop-loss orders to manage risk and identifying confirmation signals, such as a strong candlestick pattern or a surge in volume, to validate the breakout. For instance, a breakout from a symmetrical triangle confirmed by a strong bullish candlestick and high volume is a higher probability trade setup than a breakout with low volume and a weak candlestick pattern.
Conclusive Thoughts
Mastering forex price action trading isn’t just about recognizing patterns; it’s about understanding market psychology and developing a robust trading plan. By combining knowledge of candlestick patterns, chart formations, and effective risk management, you’ll be well-equipped to navigate the forex market with confidence. Remember, consistent practice and discipline are key to long-term success. So, sharpen your skills, refine your strategy, and prepare to conquer the forex world.
FAQ Explained
What’s the difference between support and resistance?
Support is a price level where buyers are likely to step in, preventing further price declines. Resistance is the opposite – a level where sellers are more likely to dominate, preventing further price increases.
How much capital do I need to start forex price action trading?
The amount of capital needed depends on your risk tolerance and trading strategy. Start with a demo account to practice and gradually increase your capital as you gain experience and confidence.
Can I automate price action trading?
While some aspects can be automated (like placing stop-loss orders), fully automating price action trading is risky. Human judgment and adaptability are still crucial for navigating market complexities.
Are there any free resources to learn more about price action?
Yes! Many websites, YouTube channels, and online forums offer free educational resources on price action trading. However, always critically evaluate the information you find.